Table of contents
In this article, we will install Ubuntu Server 20.04 in the VM Virtual Box. You can also follow these steps to install Ubuntu Desktop in the Virtual Box. Some troubleshooting tips have been provided at the bottom.
Prerequisite
- Virtual Box installed on the computer (Download from here )
- Ubuntu Server 20.04 iso image (Download from here)
Let's begin
Open VirtualBox Manager
When you open the installed virtual box manager, following window will show up.
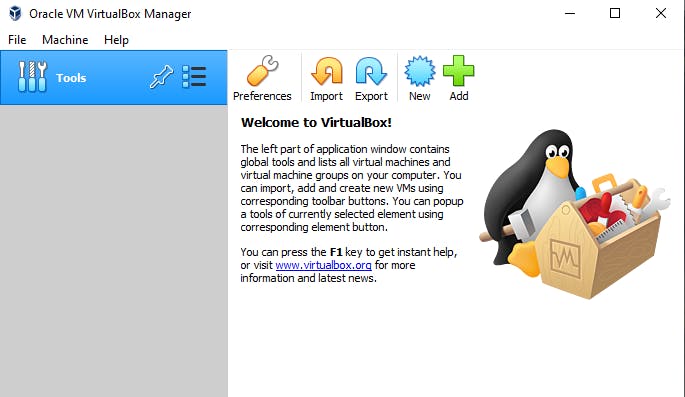
Click on New
After clicking on New, fill up the field values for the new virtual box as shown below. Then click on Next button.
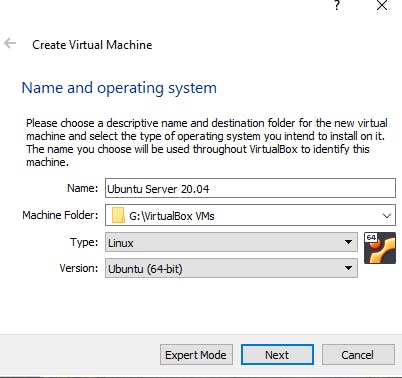
- Name:
any name you like - Machine Folder:
the folder in which the new virtual machine will be stored - Type:
Linux - Version:
Ubuntu (64-bit)
Memory Size
Select Memory(RAM) size to be allocated for the virtual machine. I am allocating 1GB Memory. You can allocate more if you require more RAM. It is a good idea to not allocate more than half of your actual memory size.
Then click on Next

Hard Disk
Then choose Create a virtual hard disk now option and click on Next, then choose VDI (VirtualBox Disk Image) option in the Hard disk file type and click on Next.
Storage on physical hard disk
In this section, you can choose either of the options according to your preference. I am choosing Dynamically allocated
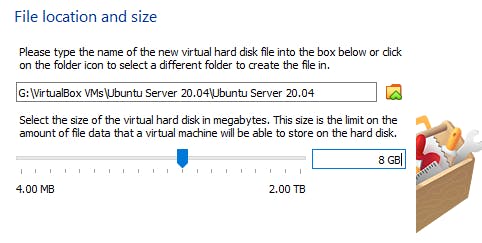
File location and size
Choose the disk size to be allocated for the Ubuntu Server virtual machine file. I am allocating 8GB but you can allocate more if you need more size.
Note: This cannot be altered once the virtual machine has been created, so define the size wisely.
Click on Create
Now, a new virtual machine has been created and can be seen on the left panel of the VirtualBox Manager.
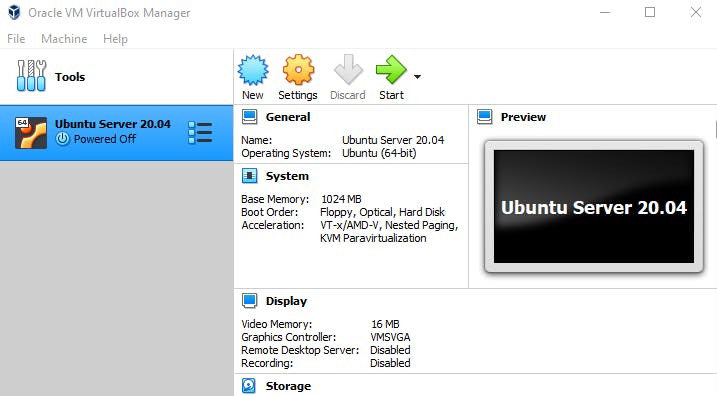
Click on Start
After clicking on Start(green right arrow) button, following window shows up.
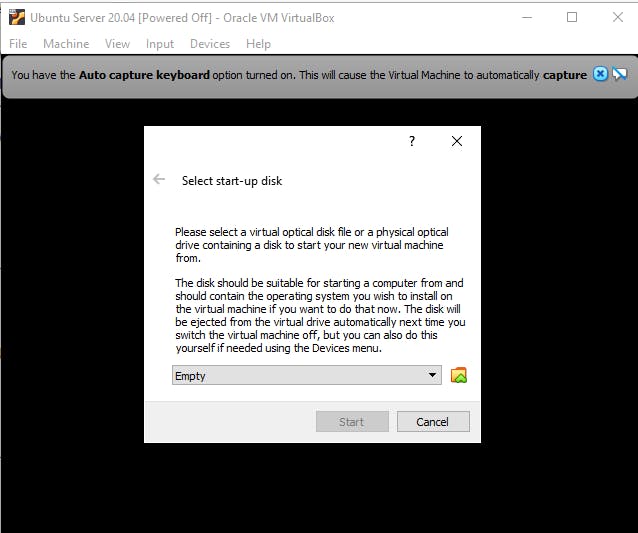
In this window, we have to provide the Ubuntu Server 20.04 iso image (download from here if you haven't yet).
Choose the downloaded iso image
Click on the folder icon

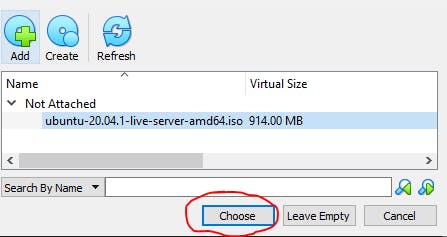
This will open a new window. Click on Add button and choose the Ubuntu Server iso image. Then click on Choose button.
Start the virtual machine
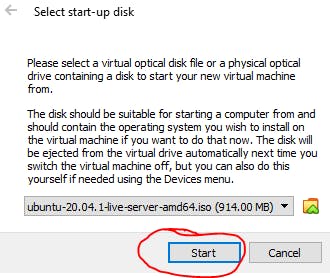
Then click on Start as shown below.
This will start the virtual machine using the chosen Ubuntu Server iso image.
Installing process
The installation process is fairly straight forward. I will note down some important steps here.
- Choose your language. I chose English.
- If prompted for updating to the latest installer, you can choose to do so.
- In subsequent steps, continue selecting default options.
- In storage configuration step, make sure there is
(X)before theUse an entire diskoption and then using down arrow key, press Enter onDone
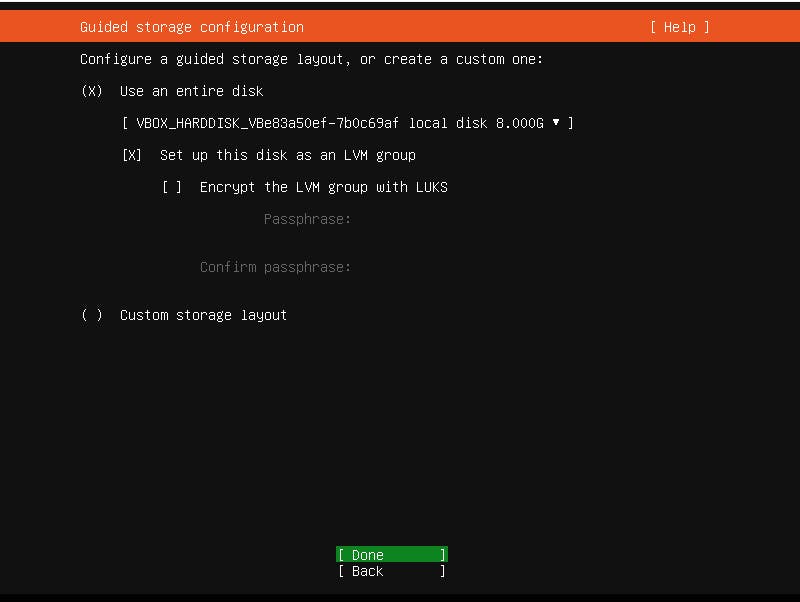
- Press Enter on
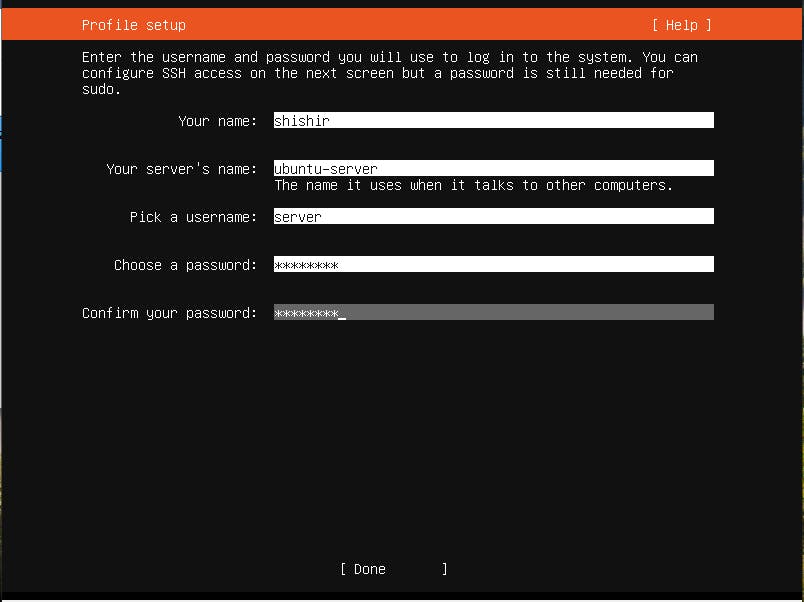
Doneagain, and SelectContinue. - Enter server's name, username and choose a password. The username and the password will be required when accessing the server later.
Then continue with
Done.
- In SSH setup, press
Enterkey to selectInstall OpenSSH server, then continue withDone

- Then press Enter on
Doneagain - The system should be installing now
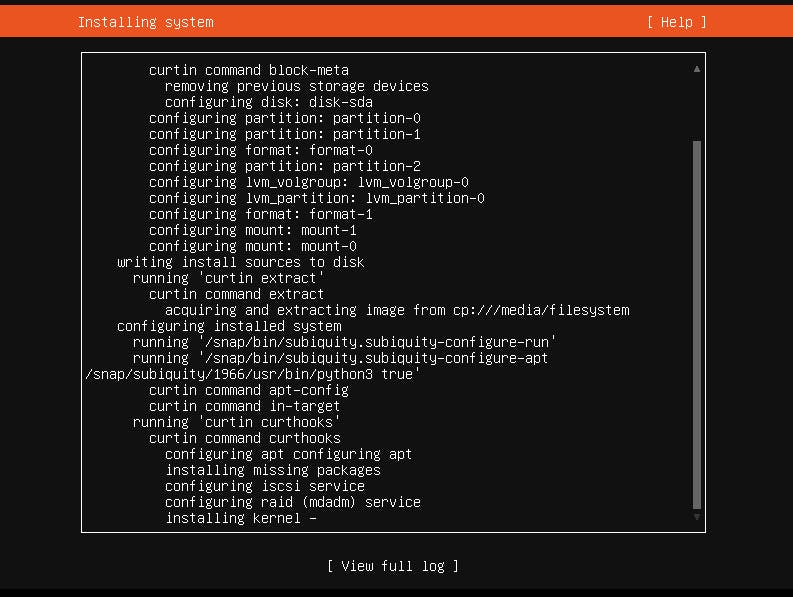
Restart and login
After the installation is complete, the virtual machine will restart and login screen will show up as shown below. Enter your username and password.
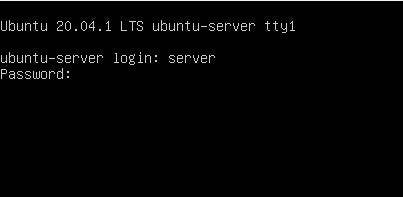
Server installed successfully
After successful login, this screen shows up and the installation process is complete.

Now, you can safely delete the Ubuntu iso image that was downloaded earlier.
Troubleshooting
If you are experiencing virtualization error similar to the error shown below, follow this article to resolve it.
Not in a hypervisor partition (HVP=0) (VERR_NEM_NOT_AVAILABLE).
AMD-V is disabled in the BIOS (or by the host OS) (VERR_SVM_DISABLED).
Result Code: E_FAIL (0x80004005)
Component: ConsoleWrap
Interface: Console {345aef7d-2c8a-3345-eb4a-7da887fe477b}
If the installation is stuck in
Installing security updates, you can cancel the update and restart. This is safe. Then you can update the system after logging in by entering the following commands.sudo apt update sudo apt upgradeIn case the installation process starts all over again after restarting the virtual machine, follow these steps to resolve it.
In the VirtualBox Manager window,
right clickon theUbuntu Servermachine and click onSettings.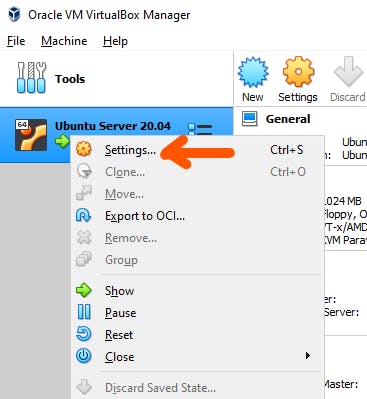
- Click on
Storagetab on the left panel. Then in the
Controller: IDEsection, click on the Ubuntu iso image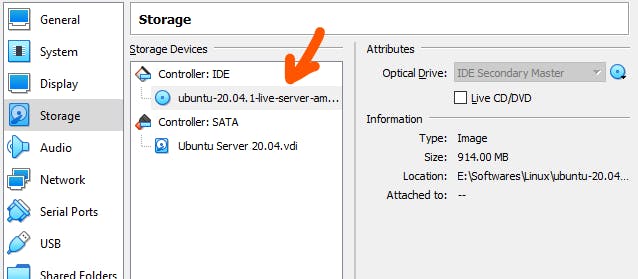
On the right panel, click on the disk icon in the
Optical Driveoption.- Then click on `Remove Disk from Virtual Drive'
- Click on
Ok
On the next start of the virtual machine, it will boot up correctly.
Any questions?
If you have any questions, or if you have any feedback and suggestions, please feel free to comment. Thanks for reading.
